Windows Recovery Environment (RE) Explained
Published on 25 Jul 2012Tags #bcdedit #BIOS #Diskpart #GPT #MBR #reagentc.exe #UEFI #Windows 7 #Windows 8 #Windows To Go #WinRE
Windows Recovery Environment (RE) is based on the Windows Preinstallation Environment (PE) and can be extended to be a minimalistic system to recover a somehow broken systen. Windows RE is configured in the boot configuration data to be the failover system for the primary boot entry. If the boot loader fails on the default entry, it will automatically try to boot into the recovery environment.
Windows RE offers the following features:
- System Repair attempts to correct typical issues rendering the system unbootable, e.g. registry corruption, missing or damaged system and driver files, disk metadata corruption, corrupt BCD etc.
- System Restore using an existing restore point
- Windows Backup Disaster Recovery
- Command Prompt with access to standard console tools
- OEM Support/Recovery Tools
Learning about the Local Windows RE
On Windows 7 and Windows Server 2008 R2 is installed on the system partition by default and is accessible through the Windows boot menu. After authenticating with a local administrator accout, Win RE displays several recovery options including a command prompt.
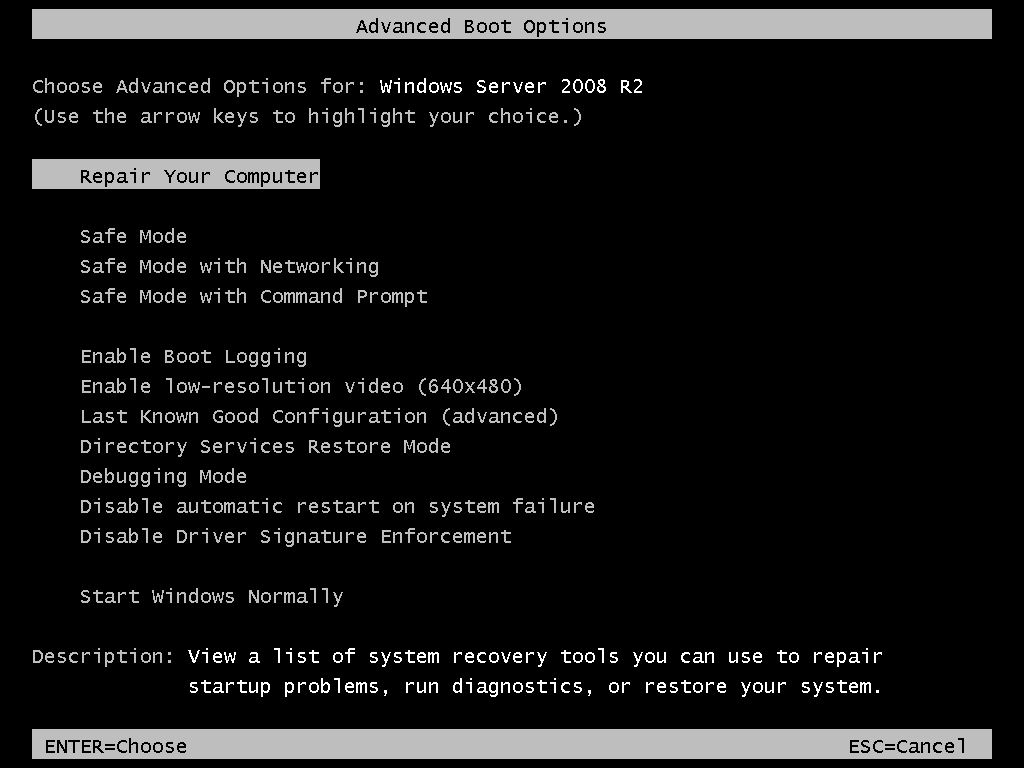


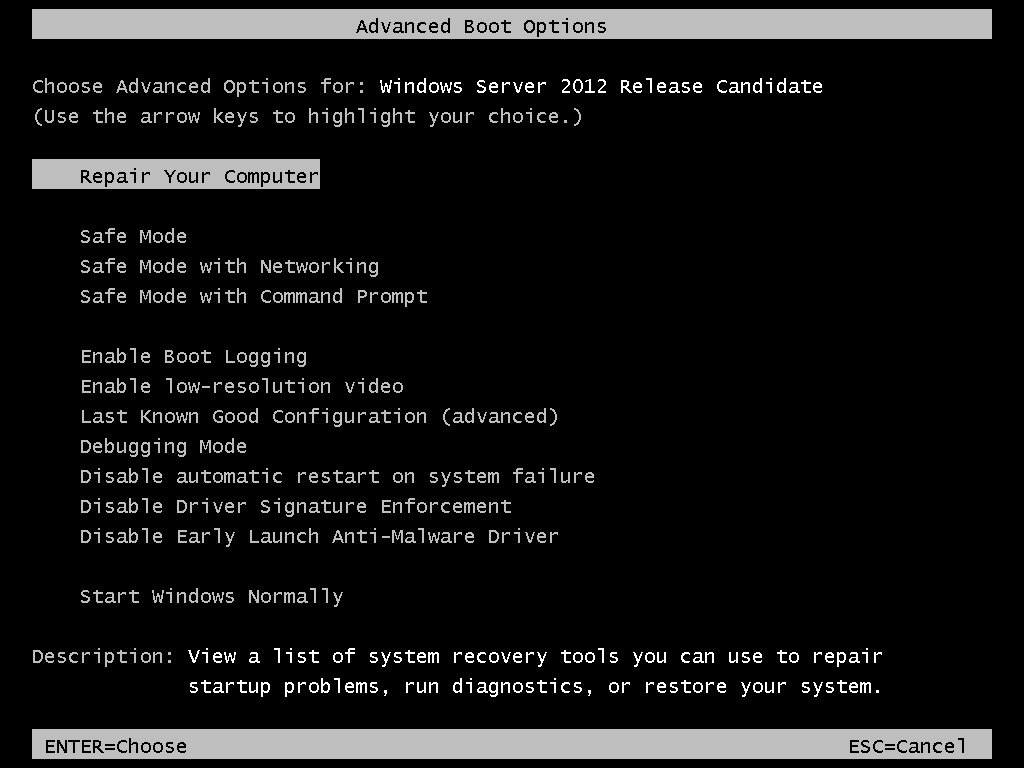
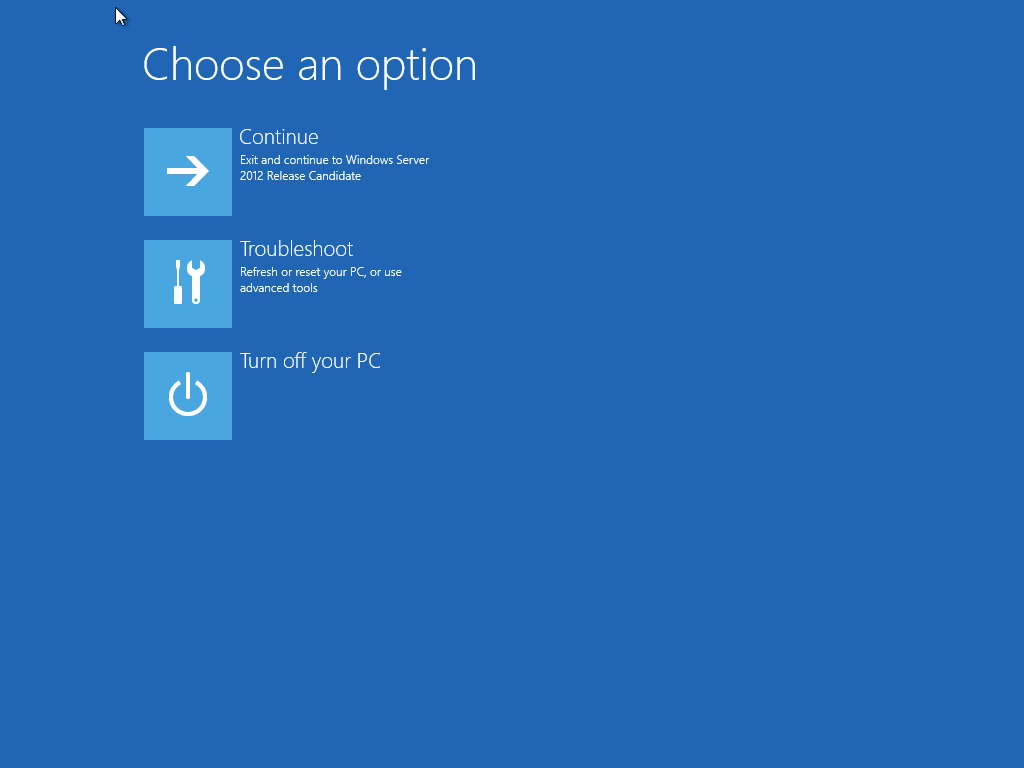
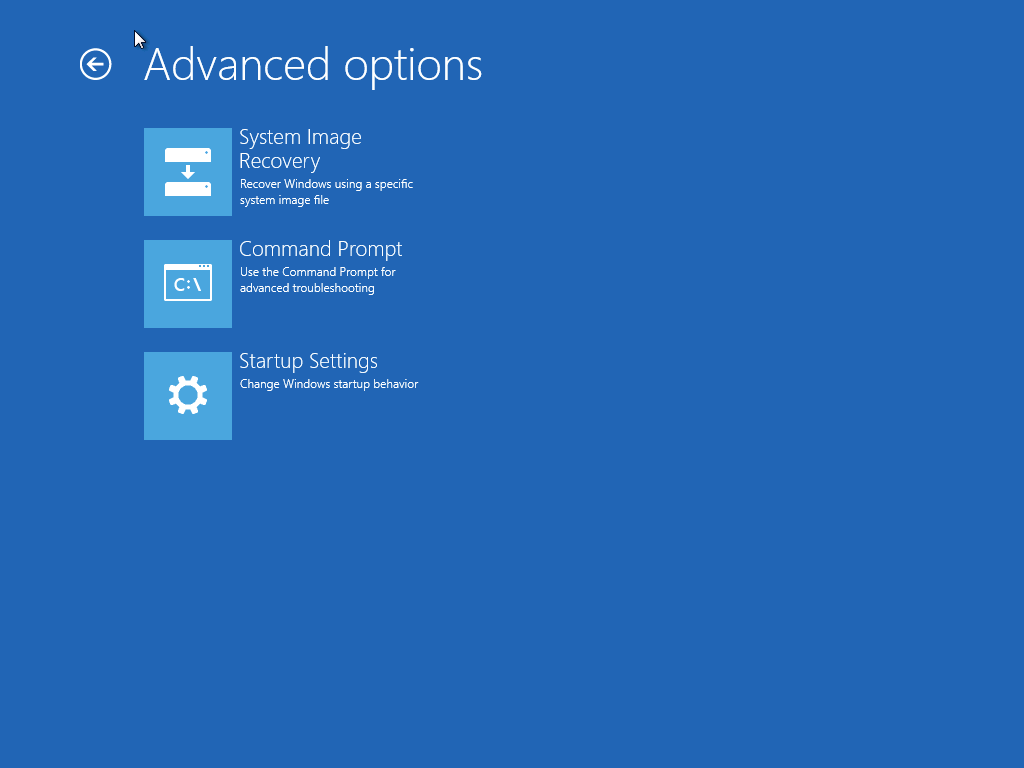
Windows 8 and Windows Server 2012 handle the recovery environment entirely different. It puts Windows RE on the MSR partition by default. The following screenshots show the (now graphical) boot menu as well as Win RE. Note that Windows 8 may be booting to fast to reach the boot menu by pressing F8. Instead you can hold down the shift key when pressing reboot on a started Windows 8. This will allow you to choose how to proceed after rebooting the machine.


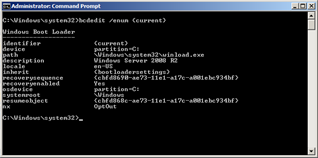
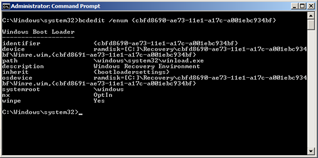
Windows offers a command line tool called reagentc.exe to configure Windows RE. Running reagentc.exe /info displays the current configuration.

Windows RE is usually configured to take over if the default boot entry fails for some reason. For this purpose, the boot entry contains a parameter called recoverysequence (first screenshot below) which links to the appropriate boot entry for Windows RE (second screenshot below).
Move Windows RE to Separate Partition
The recovery partition is a hidden partition of at least 300MB. On BIOS systems with an MBR formatted drive, the recovery partition has the type 0x27. On UEFI systems with an GPT formatted drive the recovery partition has the GUID {DE94BBA4-06D1-4D40-A16A-BFD50179D6AC}.
To use a separate partition for WinRE on an existing installation you will have to shrink the system partition by 300MB and create a new primary partition. Setting the id requires the user of diskpart:
- Select the appropriate partition:
select disk N,select partition N - Adjust the partition id:
set id=27orset id={DE94BBA4-06D1-4D40-A16A-BFD50179D6AC}
To verify these steps, you can display the type/ID by selecting the appropriate partition (select disk N, select partition N) and by running detail partitioninside diskpart.
As described above, Windows RE is automatically installed on the system partition. You can make Win RE slightly more independent of the system drive by moving it to a separate partition. The following commands assume that you already have a dedicated partition for Win RE with at least 300MB.
- Assign a drive letter to the recovery partition in
diskpart:list volume,select volume N,assign letter=q - Disable Win RE:
reagentc /disable - Remove Win RE from system partition:
RD C:\Recovery - Copy Win RE to separate partition:
Robocopy.exe C:\Windows\System32\Recovery\ Q:\Recovery\WindowsRE\ Winre.wim /copyall /dcopy:t /move - Configure Win RE:
reagentc /setreimage /path Q:\Recovery\WindowsRE - Enable Win RE:
reagentc /enable - Remove the drive letter in
diskpart:remove letter=q
The command line options of reagentc for Windows 7 and Windows 8 are documented in Microsoft TechNet.
Windows To Go
Although the Windows Recovery Environment is extensible and provides a command prompt for manual steps, it is limited to predefined tasks and command line tools. Windows To Go allows for an entire Windows system to be launched and run from a portable device. By using the full power of the graphical user interface, IT professional are able to perform more complex tasks such as connecting to network shares, sorting through files and involving internet access.
The standard guide for deploying Windows To Go on a portable drive is limited to BIOS systems because it only contains a NTFS formatted partition. I have provided a step-by-step guide for Windows To Go which is bootable on UEFI systems. Note that this requires two partitions which are not supported by USB devices registering as removable drives.