Talking to the XML Service (Update)
Published on 17 Jul 2008Tags #Free Tool #HTTP #Presentation Server / XenApp #Web Interface #XenDesktop #XML service #XmlServiceExplorer
Haven’t we all tried to figure out why a setup of Presentation Server with Web Interface and Program Neighborhood Agent is not working as it was designed to be? And haven’t we all traced the network traffic using WireShark to expose the misbehaving component? Yes, to both questions.
In this article I will present you the details of the Web Interface communicating with the XML service. In addition, I will provide an application to explore the capabilities of the XML service.
Inside the XML Service
Presentation Server provides a system service running on port 80 (by default) called Citrix XML Service. As implied by its name, the service uses XML to format the data exchanged over HTTP. All requests and responses are defined in the Document Type Definition (DTD) called NFuse.dtd. This file is distributed with all versions of Web Interface (C:\inetpub\wwwroot\Citrix\XenApp\conf).
By posting any correctly formatted request to the XML service on its designated port and to the path /scripts/wpnbr.dll results in a response containing the desired information. This works for all versions of Presentation Server, XenApp and XenDesktop.
The following sections will discuss the requests and responses exchanged with the XML service during login, enumeration, launch, disconnect, reconnect and logoff using the Web Interface. All documented steps can be followed by clicking on the Request* and Response* links in table at the end of each section. A screen shot shows the data exchanged between Web Interface and XML service.
Hands-On: Logon/Enumerate
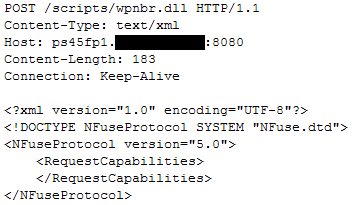
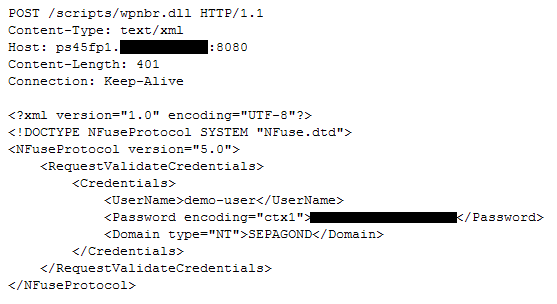
Before authenticating a user, Web Interface retrieves the capabilities of the server hosting the XML service (step 1: RequestCapabilities) and attempts to logon the user with the presented credentials (step 2: RequestValidateCredentials). There is no kind of session for authenticated users maintained by the XML service. Instead the ResponseValidateCredentials merely indicates whether a user has presented matching credentials to the Web Interface. All requests for user-specific information contain the credentials cached by Web Interface (see the requests in steps 3 and 5). The password is presented to the XML service in a scrambled string.
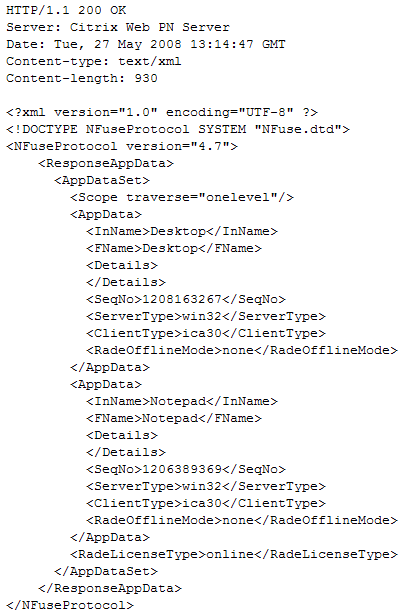
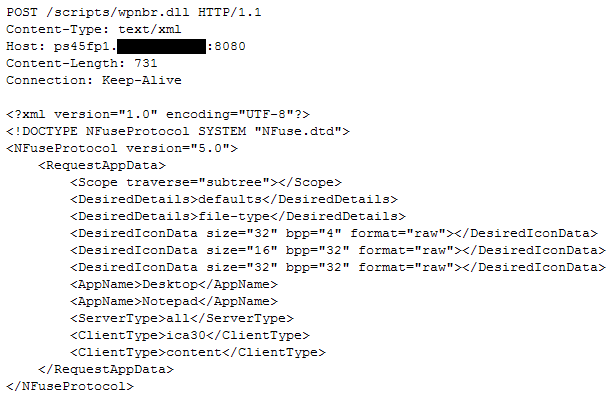
Step 3 asks for a list of applications for the user identified by the credentials, the client name and the IP address of the client device. Note that the response contains only a few pieces of information and that Web Interface needs to send a second RequestAppData (step 4) to obtain presentation (e.g. icon data) and launch information.
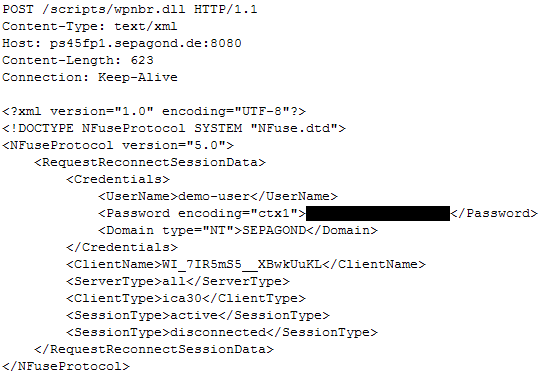
In the default configuration, Web Interface attempts to reconnect any disconnected sessions for the authenticated user immediately after logon and enumeration (step 5). In this example, no sessions are in the disconnected state and, therefore, the ResponseReconnectSessionData is empty.
| Step | User | Web Interface | XML Service |
|---|---|---|---|
| 1 | Navidate to Web Interface | RequestCapabilities | ResponseCapabilities |
| 2 | Logon | RequestValidateCredentials | ResponseValidateCredentials |
| 3 | RequestAppData | ResponseAppData | |
| 4 | RequestAppData | ResponseAppData | |
| 5 | RequestReconnectSessionData | ResponseReconnectSessionData |
Hands-On: Launch
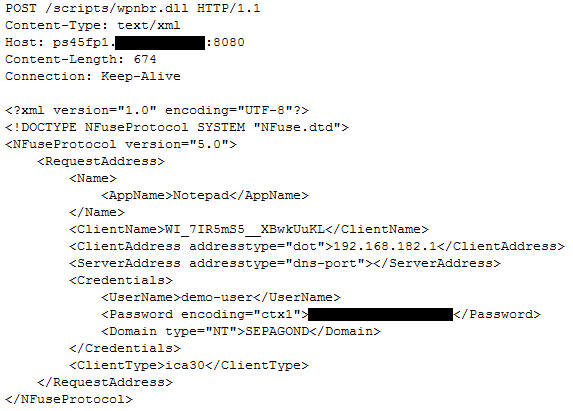
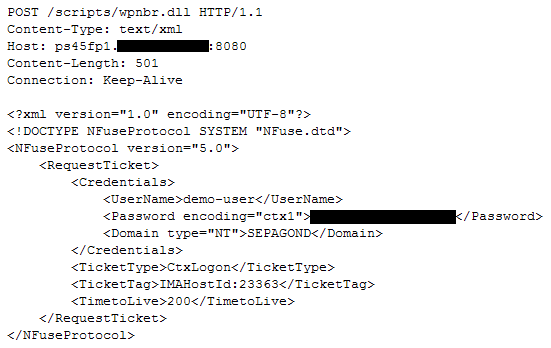
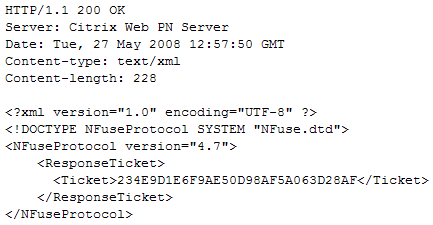
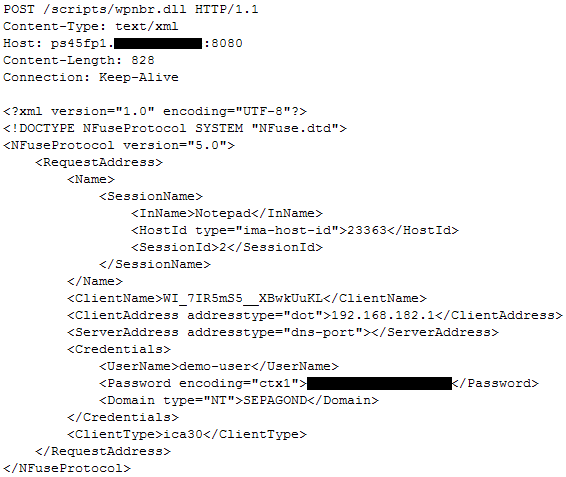
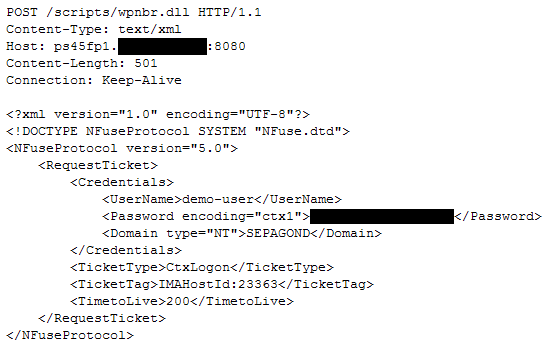
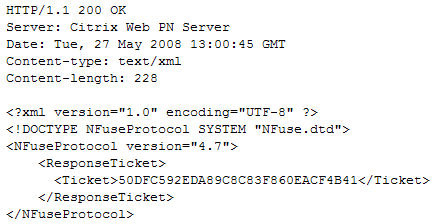
As soon as a user launches an application by clicking on the corresponding icon and text (step 6), Web Interface determines the address of a member server able to serve the requested application (RequestAddress). After retrieving a ticket for the user session to be initiated (step 7), the web browser is sent the file launch.ica resulting in the launch of the locally installed client.
Most information used to build the file launch.ica results from the second RequestAppData during logon (step 4) cached by the Web Interface.
| Step | User | Web Interface | XML Service |
|---|---|---|---|
| 6 | Launch | RequestAddress | ResponseAddress |
| 7 | RequestTicket | ResponseTicket | |
| 8 | Serve launch.ica |
Hands-On: Disconnect
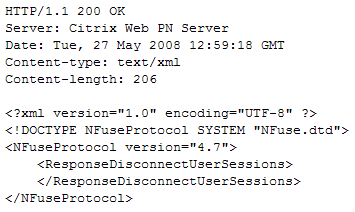
When a user hits the disconnect button or link in Web Interface (depending on the version), a single request is sent to the XML service instructing the farm to disconnect all user sessions (step 9: RequestDisconnectUserSessions). The XML service replies with an empty ResponseDisconnectUserSessions denoting no errors have occurred.
| Step | User | Web Interface | XML Service |
|---|---|---|---|
| 9 | Disconnect | RequestDisconnectUserSessions | ResponseDisconnectUserSessions |
Hands-On: Reconnect
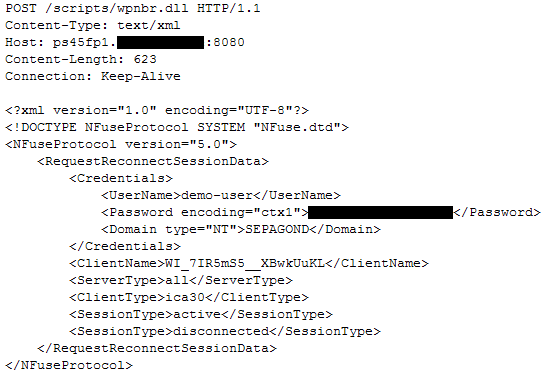
Web Interface enables users to reconnect previously disconnected session either during logon (see step 5) or by clicking the reconnect button or link (step 10). At this point, the XML service answers the request with a ResponseReconnectSessionData containing a list of all disconnected sessions identified by the HostId and the SessionId fields. Using these fields, a RequestAddress is constructed asking for the address of the member server specified by the HostId field (step 11). Before the file launch.ica is built, a session ticket is requested (step 12) with information from the previous step.
| Step | User | Web Interface | XML Service |
|---|---|---|---|
| 10 | Reconnect | RequestReconnectSessionData | ResponseReconnectSessionData |
| 11 | RequestAddress | ResponseAddress | |
| 12 | RequestTicket | ResponseTicket | |
| 13 | Serve launch.ica |
Hands-On: Logoff
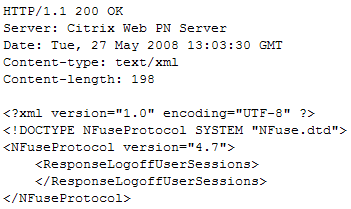
Similar to the request for disconnecting any active sessions, the logoff command issued by the user results in a RequestLogoffUserSessions containing almost identical information (step 14). As before, an empty response indicates a successful operation causing all active sessions to be disconnected by the member server.
| Step | User | Web Interface | XML Service |
|---|---|---|---|
| 14 | Disconnect | RequestLogoffUserSessions | ResponseLogoffUserSessions |
XmlServiceExplorer
So far, so good. But it’s one thing to read about my discoveries. You could now go and start building your own XML requests using tools like Fiddler2, a Web Debugging Proxy, and sending them to a XML service of your choice. But wouldn’t that be wearisome? Wouldn’t you rather create these requests using a GUI? That’s what I thought and why I wrote an application called XmlServiceExplorer enabling you (and me - all of us) to communicate with the XML service to …
- … ask for information you would otherwise be denied.
- … debug the behaviour of the server farm.
- … mimic the steps performed by Web Interface like I did for this article.

To get going, all you need is to download the executable and place a copy of your NFuse.dtd in the same directory as the executable. It is based on Visual Basic .NET so that the .NET Framework 2.0 is also a requirement to run the XmlServiceExplorer.
Update: Using the original DTD provided by Citrix Web Interface results in an exception after launch. This is caused by a syntactical error in two definitions. To resolve this issue, replace the definition of the attribute list of IconData and DesiredIconData with the following text. This change does not alter the specified XML structure but merely moves the comments to correct the syntactical error in the DTD.
<!ATTLIST IconData
size CDATA #REQUIRED
bpp CDATA #REQUIRED
format CDATA #REQUIRED>
<!-- size: 16 | 32 | 48 | 128 | 256 –>
<!-- bpp: 4 | 8 | 16 | 32 –>
<!-- format: raw | png -->
<!ATTLIST DesiredIconData
size CDATA #IMPLIED
bpp CDATA #IMPLIED
format CDATA #IMPLIED>
<!-- format: raw | png –>
<!-- size: 16 | 32 | 48 | 128 | 256 –>
<!-- bpp: 4 | 8 | 16 | 32 -->
After launching the application (see the above screen shot), you will have to supply a server name and check the port of the XML service. By choosing one of the tabs, you are presented a collection of configuration options. Any compulsory fields are coloured red. Optional request data can be activated by enabling the check box next to the field labelled “user-defined”. Depending on the request type, the credentials fields are automatically enabled to be filled in.
While configuring the request, the corresponding XML data is updated in the lower left text area for review. As soon as the request is sent, the response is displayed in the lower right text area. Both boxes can be used for copy and paste actions but cannot be altered directly. Whenever the XML request data is modified, the response text area is coloured red to indicate that the displayed response data does not match the current request.
I have tested this tool to be running on Windows XP, Windows Server 2003 SP2 and Windows Server 2008. It has successfully communicated with the XML service running on Presentation Server 4.5 FP1, XenDesktop 2.0 RTM and XenApp 5.0 ER.
Updates to the XmlServiceExplorer will be posted in this blog and can be accessed directly through its tag.
Have fun using it and let me know what you think about it! **
References
WireShark Network Protocol Analyzer
Fiddler2 Web Debugging Proxy