How to Manage ESX Hosts with VMM 2012 R2
Published on 11 Apr 2014Tags #ESXi #HDD #Microsoft #Network #SCSI #Storage #vCenter #Virtual Machine Manager #Virtualization #VMware
Although Microsoft offers a step-by-step guide for setting up System Center Virtual Machine Manager with VMware vCenter, I found it to be missing details. Therefore, I have created an illustrated guide for integrating vCenter and ESX hosts into VMM.
What to Configure Where
I will not cover whether it makes sense to connect VMM and vCenter but rather what tasks will have to be performed through the involved products. vCenter will be used to configure connectivity to networks and datastores. Those resources will be visible to as well as usable by VMM. On top of vCenter, VMM will manage VMs, profiles and templates.
Prepare VMM
The first thing you always do in VMM is creating logical networks. Based on this model, VMM is able to ensure connectivity between VMs as well as connectivity to physical servers.
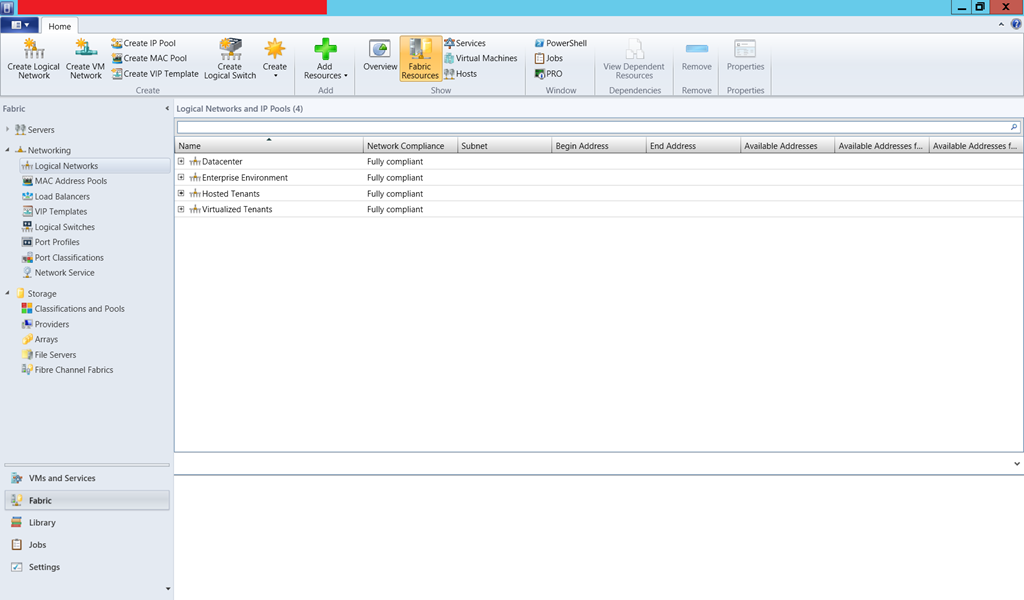
Mind, VMs are not directly connected to logical networks but to VM networks which are connected to a logical network.
Instead of startiug to work on all the stuff necessary for logical switches you are done for your ESX hosts because VMM does not affect the network configuration created in vCenter.
Add VMware vCenter in VMM
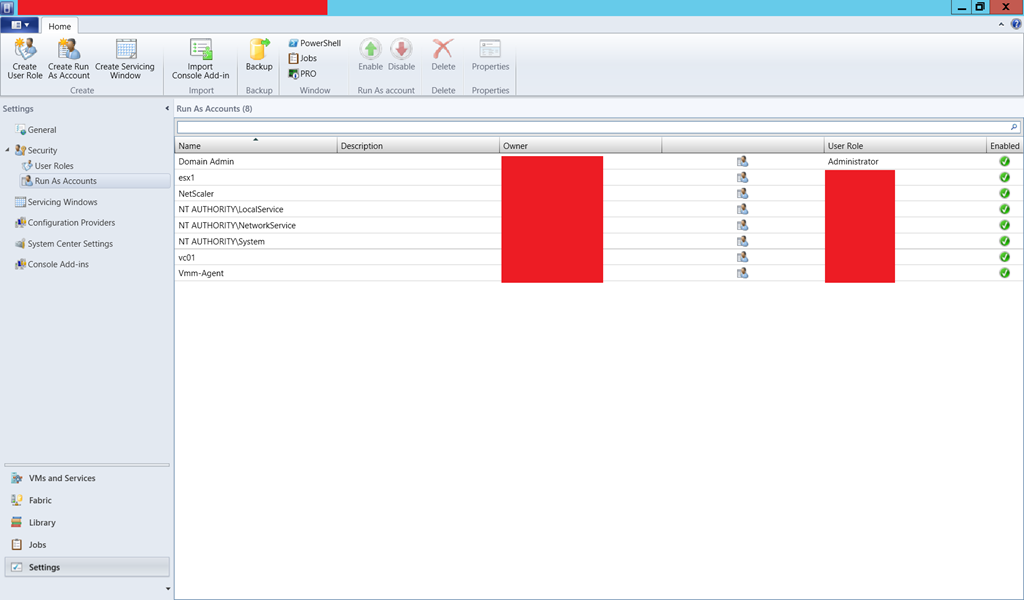
Before you can add your vCenter server in VMM you need to create a RunAs account based on an administrative user configured in vCenter. Why does VMM require administrative rights, I hear you ask? It doesn’t but I haven’t had the time to determine the minimum set of permissions. Expect another post this month!
Adding a service account from vCenter in VMM is pretty straight forward:
When adding your vCenter server in the fabric view of VMM you select the runas account created above:
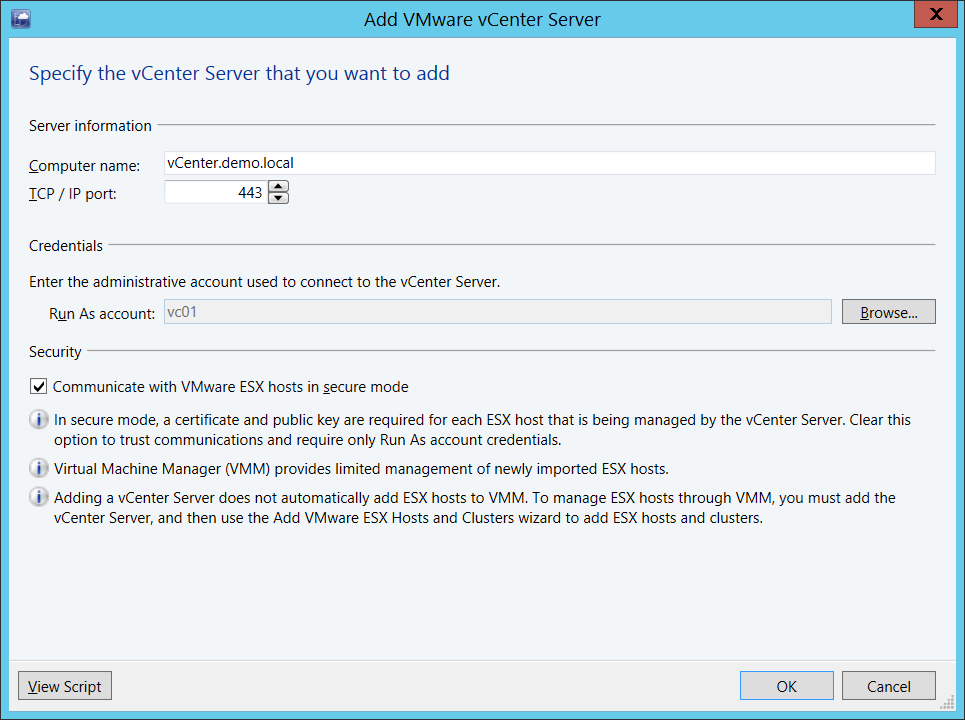
After the connection was successfully established, you need to add ESX hosts and/or clusters to VMM in the fqbric view:
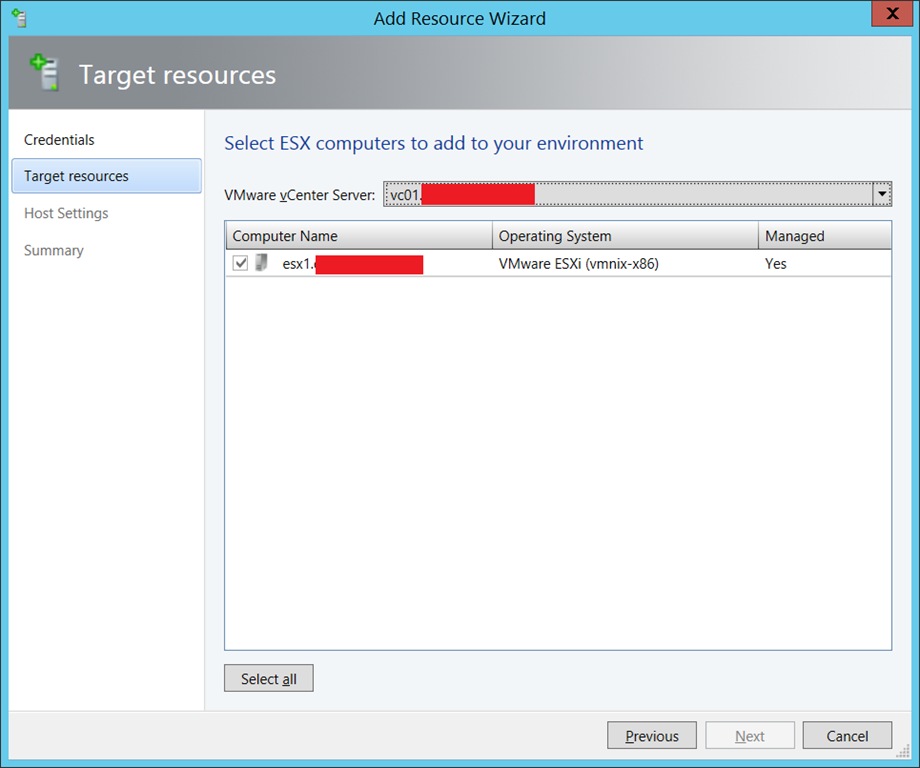
At this point you should see all ESX hosts with an OK status. If the status shows “OK (Limited)” you need to accept the certificate for every ESX host. Open the properties, go to management, click retrieve and check XXX.
Configure the ESX Host
Before an ESX host can be used for virtual machines you will have to configure networking and storage for VM placement.
When you look at the network adapters on the hardware tab of the host properties, you will notice that VMM tells you which networks are configured through vCenter and which networks are known to VMM. You need to check all logical networks that are reachable through this ESX host (see screenshot below).
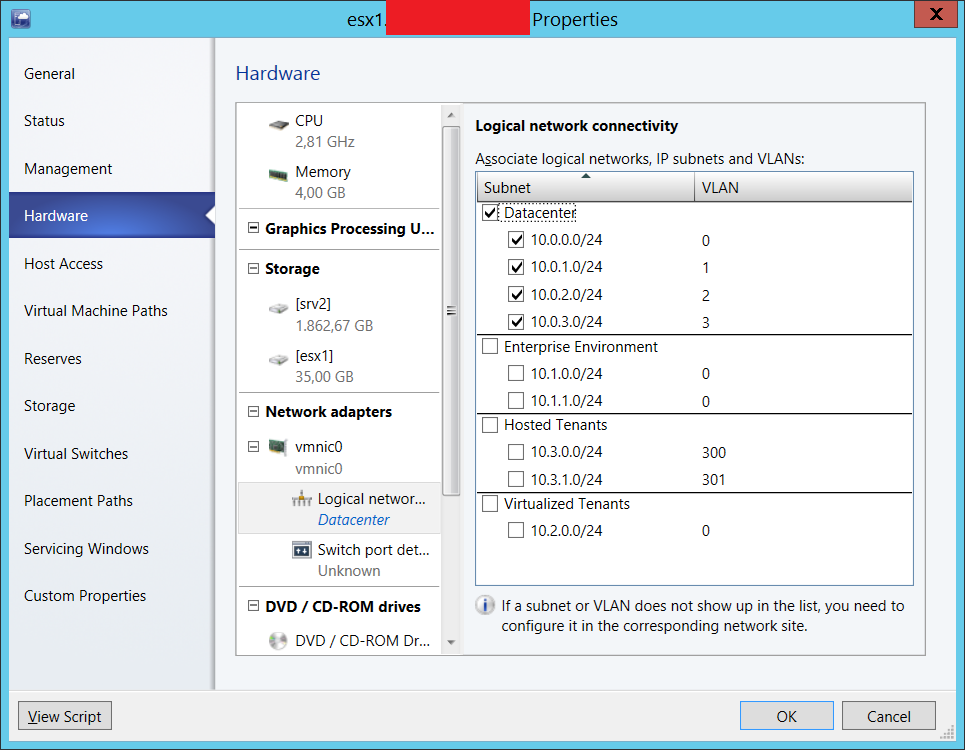
Before closing the host properties, VMM warns that these changes may result in a network interruption between VMM and ESX host if the management network is excluded from connectivity.

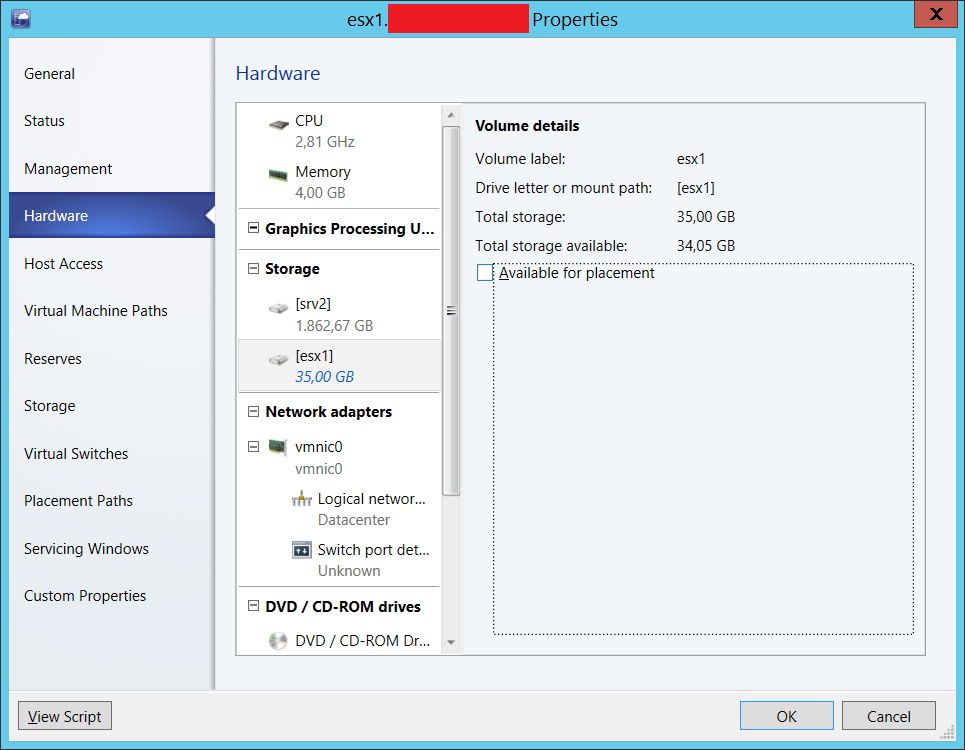
Optionally, you may want to exclude some disks from VM placement. This may be necessary if your host has local storage used for the hypervisor or some storage is reserved for some other purpose. This is performed through the storage section of the hardware tab in the host properties.
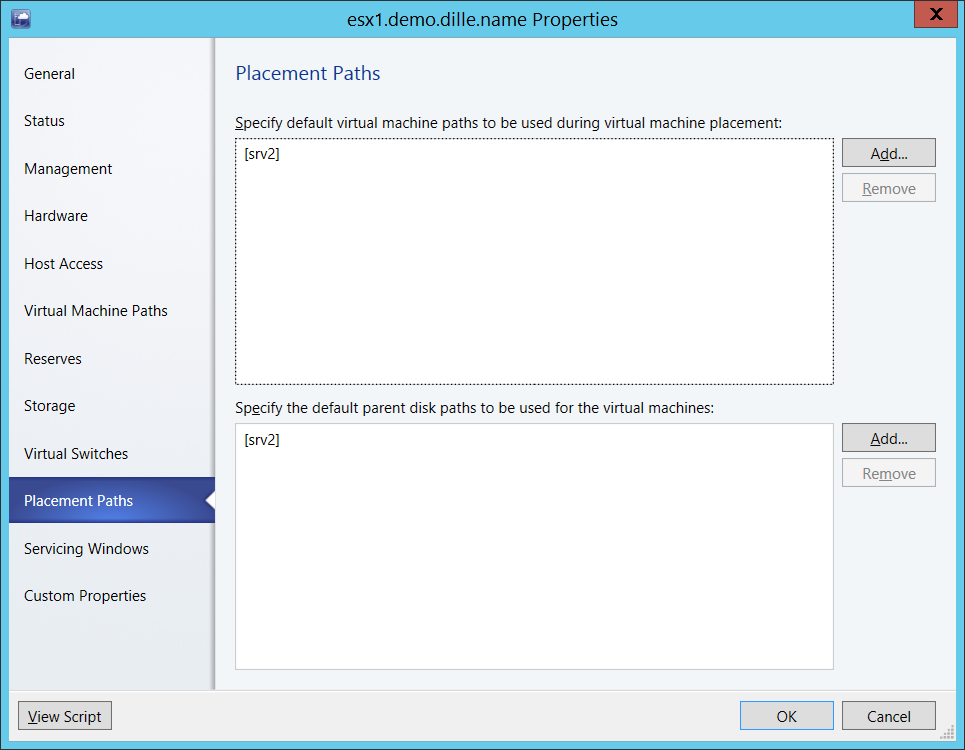
When a new VM is placed in the host, VMM uses the configured placement paths for VM configuration and virtual hard disks. Both paths need to be point to appropriate locations. The “Add” button from the screenshot below opens a dialog for browsing storage volume to select a destination folder.

Create a VM
When creating a virtual machine to be placed on an ESX host, you will have to select a generation 1 machine because only this type is supported on ESX hosts.
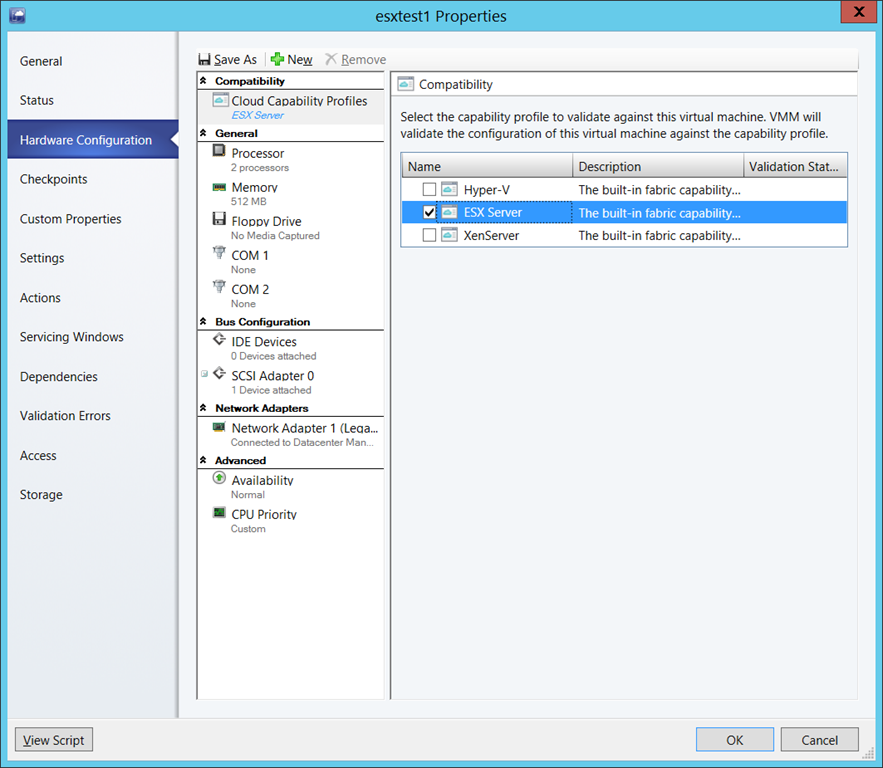
VMM will have an easier time placing your VMs on ESX hosts if you set the compatibilty accordingly:
Hard disks need to be connected to SCSI adapters because ESX does not support IDE anymore:
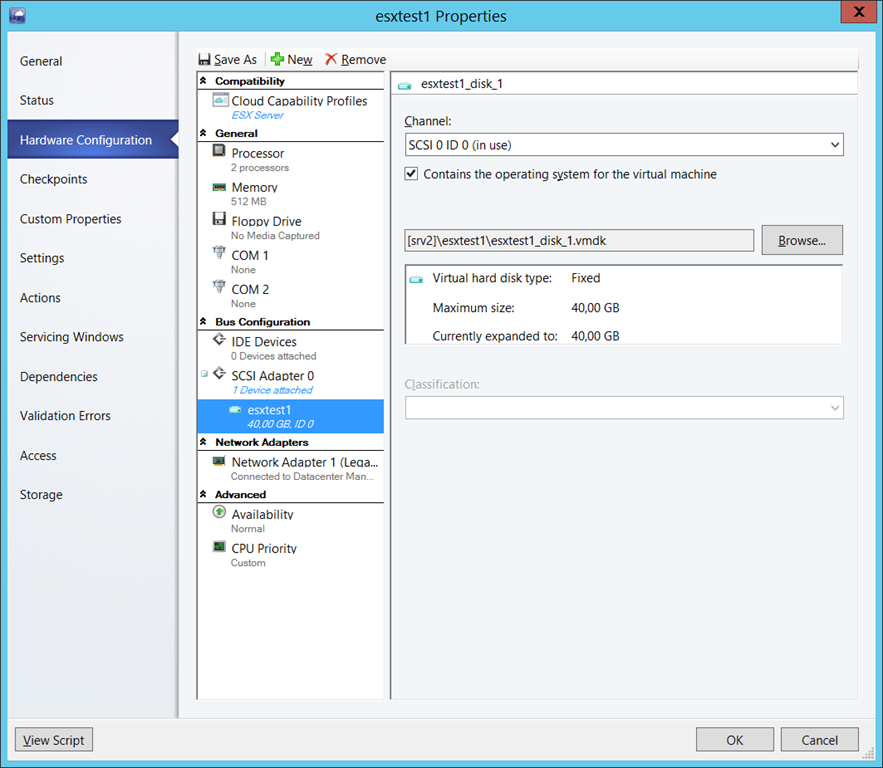
You may need to select the appropriate type for your SCSI adapter:

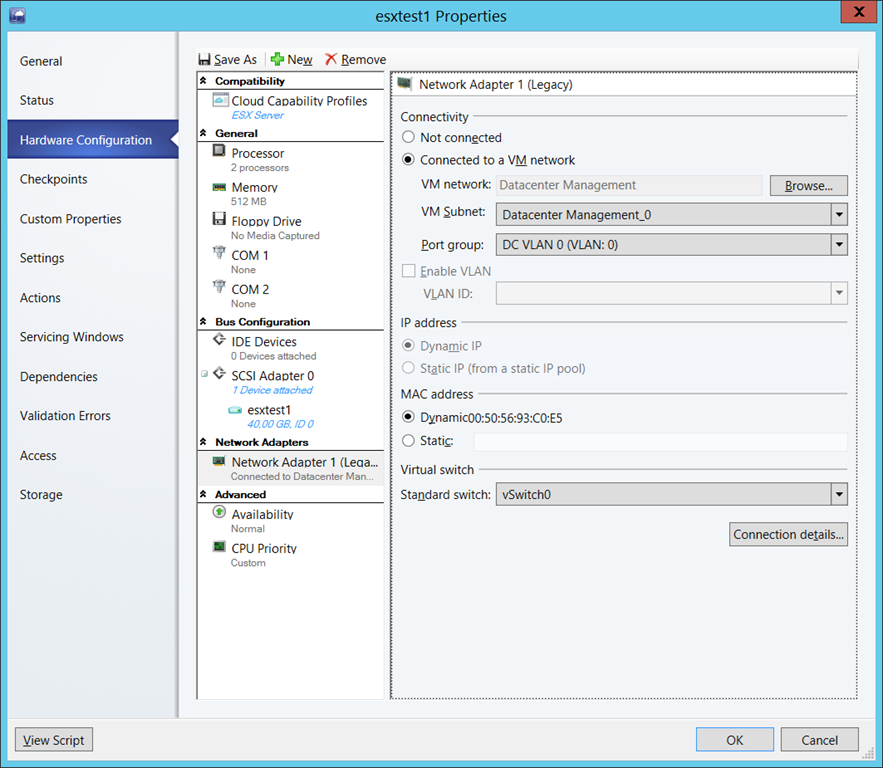
The network adapter not only accepts a VM network and a VM subnet but also maps to a port group defined in vCenter:
After completing these steps, you will find a new VM created on one of your ESX host.
About Hardware Profiles
I have deliberately demontrated the creation of a new VM instead of a hardware profile. The latter does not show all options necessary for preparing the virtual hardware:
- You cannot add a virtual harddisk and must do this when creating a VM with the hardware profile.
- A hardware profile does allow configuring port groups known from vCenter.
Consequently, you will have to mind those steps when placing a VM on an ESX host.